Lab 2: Implementing API in Anypoint Studio
Overview
By now you’ve had an opportunity to explore Anypoint Platform, available resources and how it can help with bringing together disparate applications. Now, it’s time that you try implementing an API that will route information to one of several back end systems, based on the type of request that was passed to your API.
Learning Objectives
-
Implementing a Mulesoft Anypoint Studio project from a REST API specification on Exchange
-
Consume existing system APIs to perform validation.
Step 1: Create an API implementation Using Anypoint Studio
Now that you’ve had an opportunity to explore the API specification that is created and shared, you are ready to implement the API using the Anypoint Studio. Complete the following steps to implement the Onboarding Validation Process API.
-
If Anypoint Studio is not currently open, locate and launch the Anypoint Studio icon in your workshop desktop image.

-
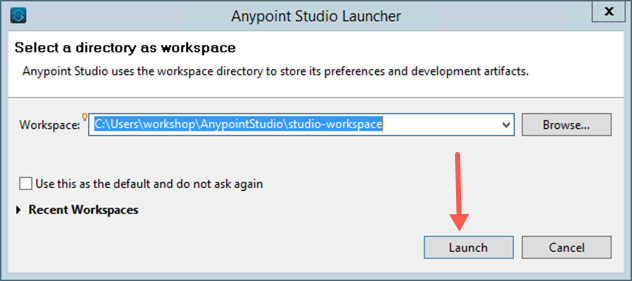
You may be prompted to choose a directory to store your workspace. Accept the default value and then click on the Launch button to continue.
-
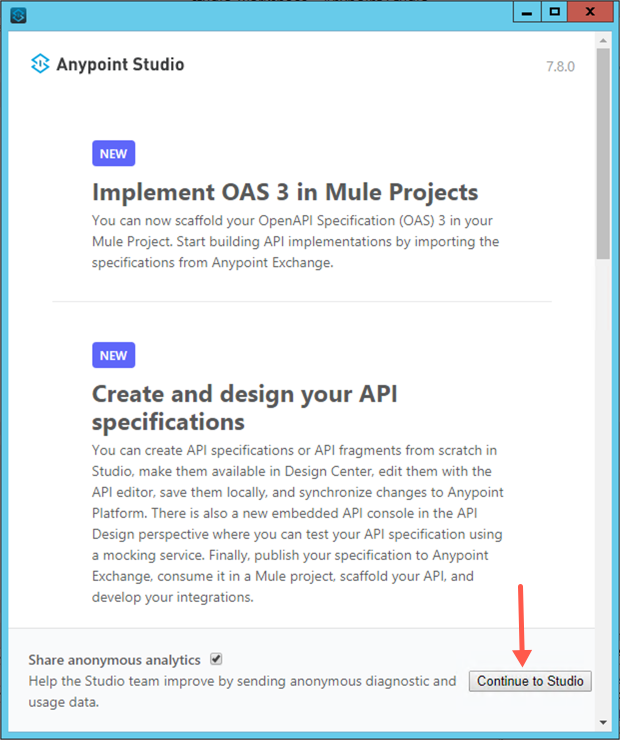
The Anypoint Studio welcome screen may appear. Click on the Continue to Studio button if it appears.
-
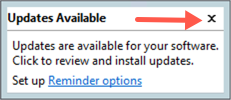
Whenever you launch Anypoint Studio it will check all of the projects in the current workspace for updates to MuleSoft components. If the Updates Available window appears simply close the window to continue. (Updating components is not required to complete this workshop.)
-
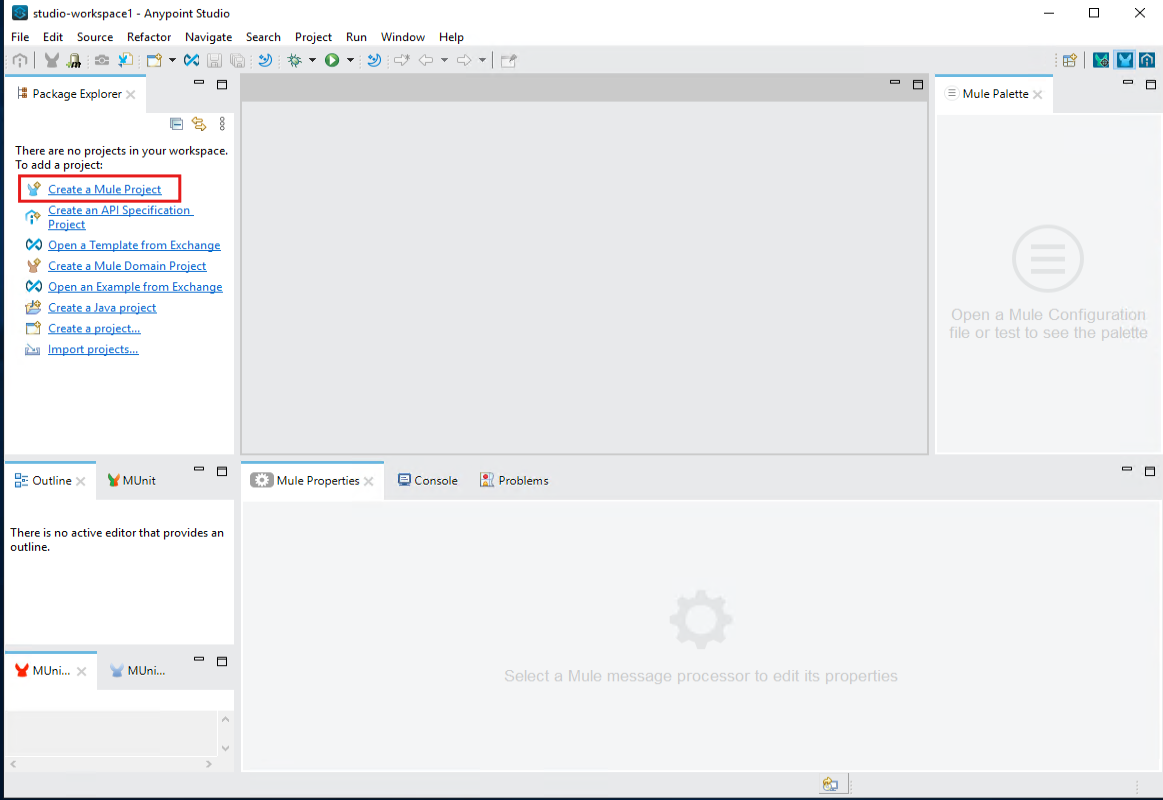
With Anypoint Studio now open and ready, let’s create a Mule Project to implement the onboarding validation process API.
-
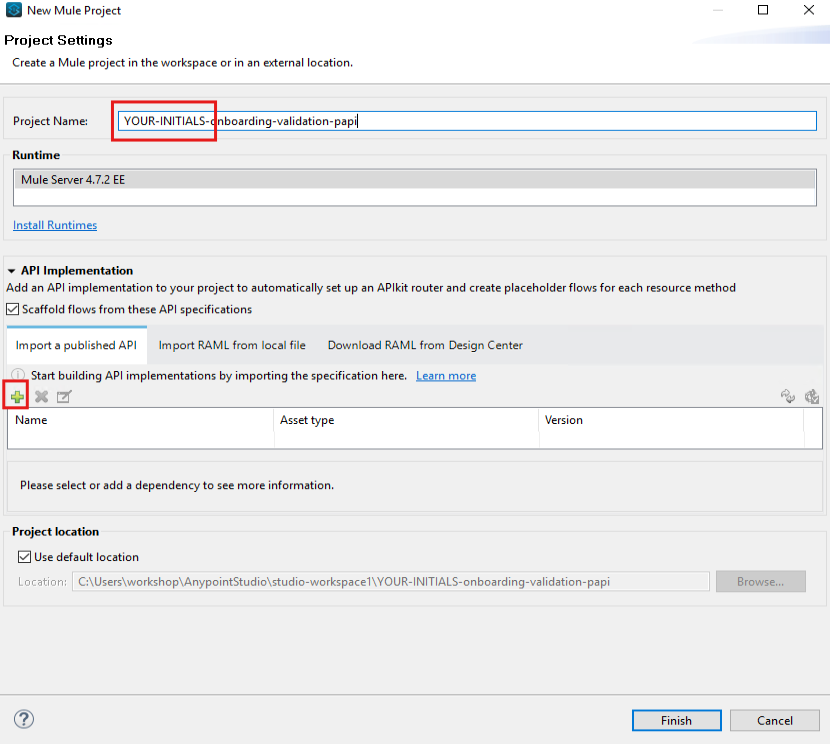
Name your project with your initials and the name onboarding-validation-papi. Next we will import an REST API specification to scaffold the project with. Click the Green plus sign, and choose "From Exchange"
-
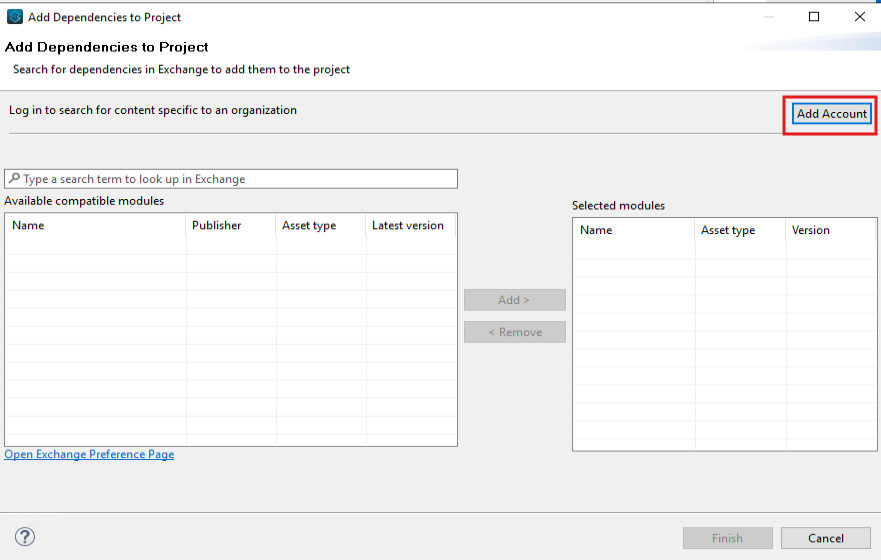
To access all the assets available in our Anypoint account, we need to log in to the Anypoint org. Click "Add Account"
-
Enter your credentials provided to you to log in.

-
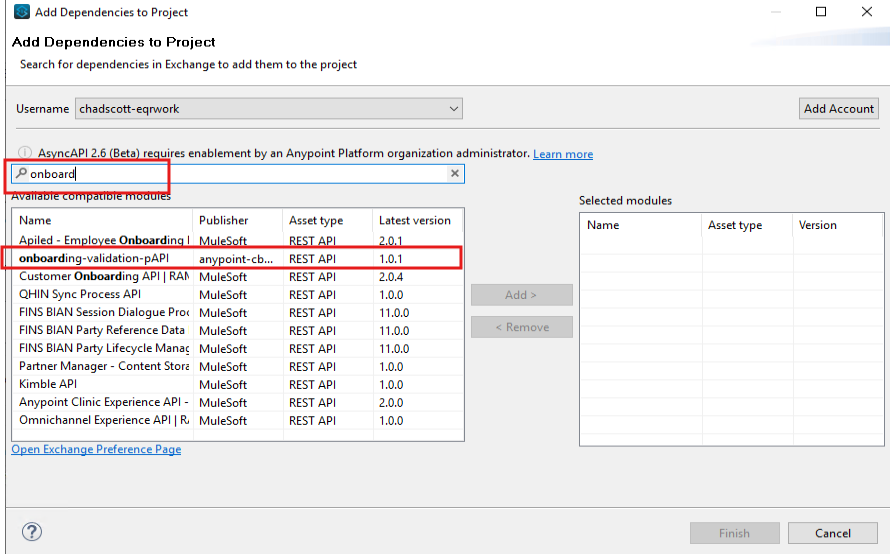
Select "No" to provide a password hint for the secure storage. Begin searching for "onboarding-validation". Once you begin typing, studio will search exchange for assets. Select "onboarding-validation-pAPI" published within your root org. Click "Add >" to add the REST API to your project. Then click "Finish"
-
Confirm the API is listed as imported, then select "Finish" to scaffold your project.

Your Mule project will display as an expanded folder on the left side in the package explorer, within the src/main/mule (Flows) folder, you should see the xml file with your respective project name. When selected, you will see the contents of the file on the canvas in the middle section of the screen. You will notice the canvas has been pre-populated with flows and components. This occurred because you chose to base this implementation on an API Spec that was published in the exchange.
-
In the canvas, scroll down to the flow named: post:\validate:application\json…
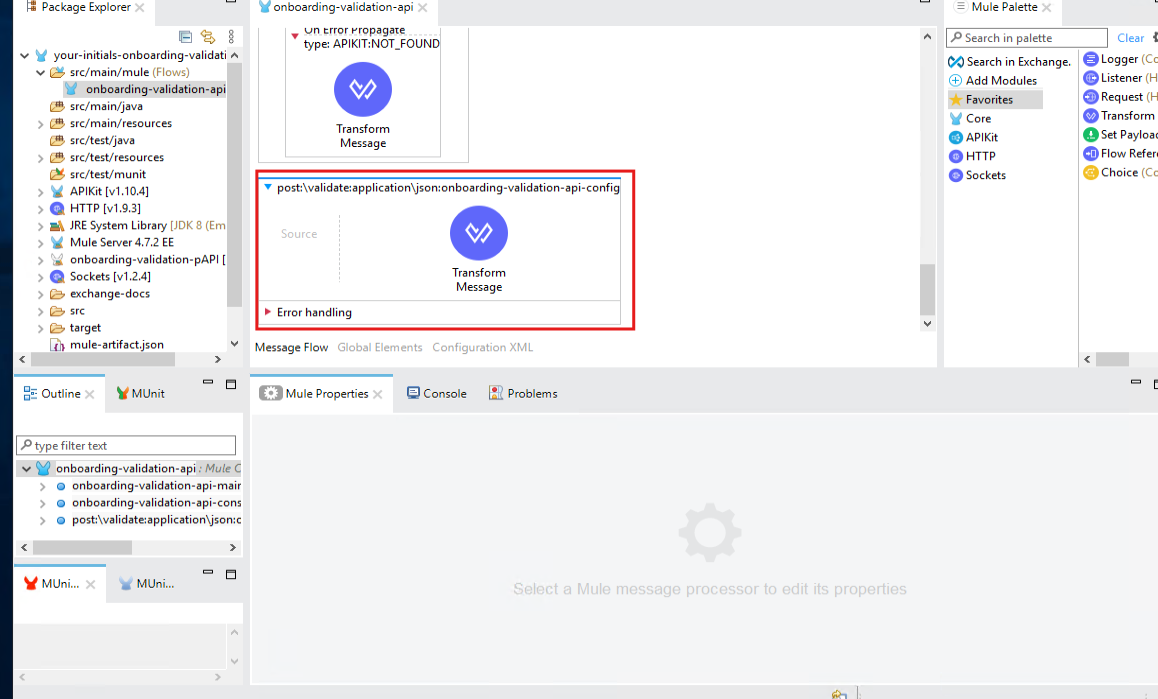
You will implement your logic within this flow in the following sections.
Step 2: Re-using API specs as Connectors in a Mule project
In the previous section you walked through scaffolding a new Mule project based on an API specification published in the Anypoint Exchange. Anypoint Exchange will also generate Mule Connectors based on the API Specification. This allows for the re-use of APIs published in the Exchange as connectors in Mule projects. For this project, two specifications will be used.
-
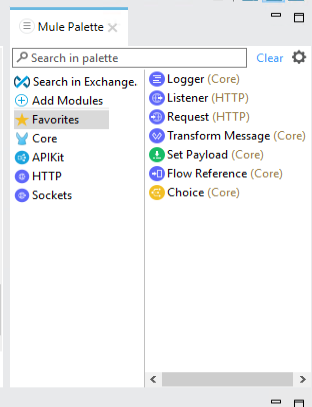
On the right side of Anypoint Studio you’ll see the Mule Palette. Frequently used message processors are available to drag and drop into your flow(s).
-
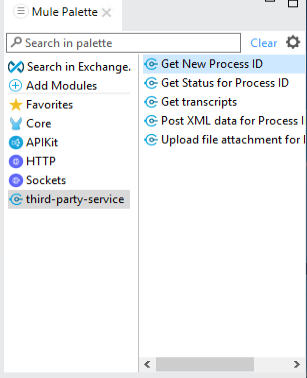
To add new modules from exchange, click "Search in Exchange". Enter "third" to begin searching, then select "third-party-service-sAPI". click "Add >", then "Finish.

-
Review the operations available in this API for you to consume. Feel free to revisit the API in Anypoint Exchange to compare.
-
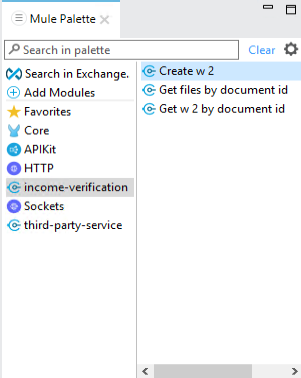
Repeat the two steps above; searching for "income" to add "income-verification-sAPI" to your project.
-
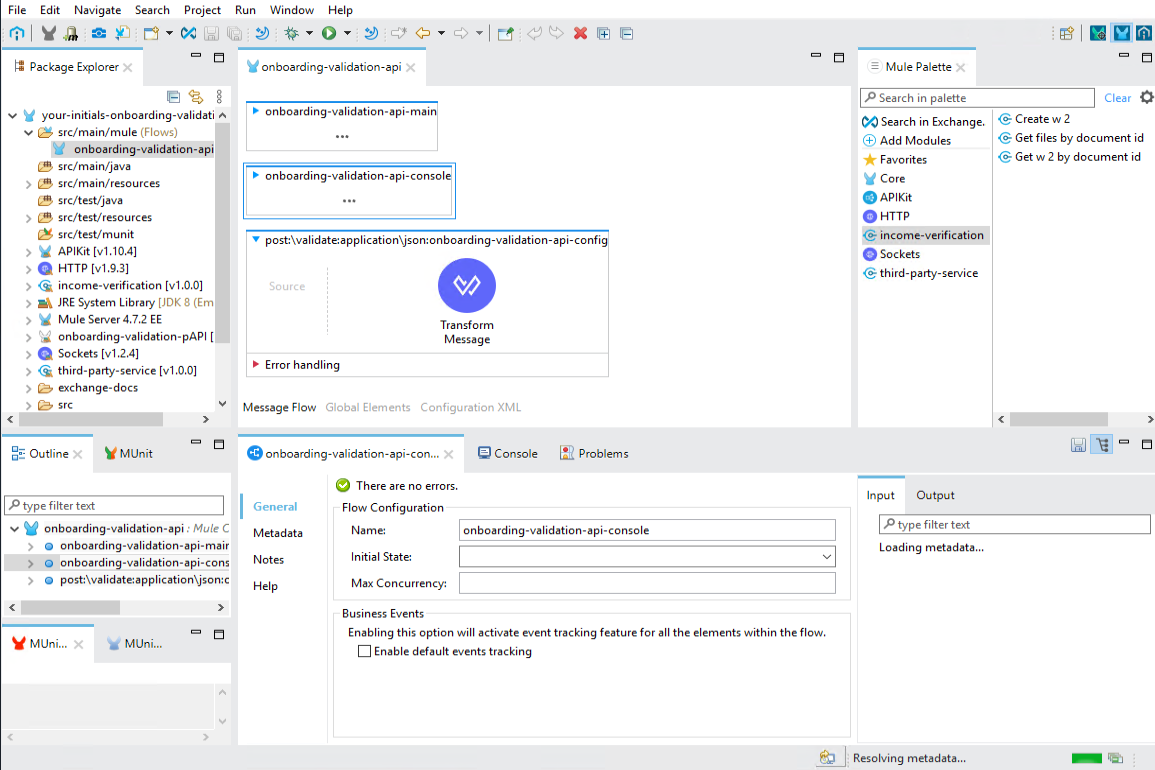
You can collapse the onboarding-validation-api-main,and the onboarding-validation-api-console flows by clicking the respective blue arrow point down near the flow names
Step 3: Connector Configuration
We now have a project ready to call our two system APIs, but we need to provide the location of the endpoints providing these services. To do that, we will create a connector configurations that use properties defined in a Configuration Properties file. This allows your project to have those configurations set at runtime to work with multiple environments (dev, stage, prod)
-
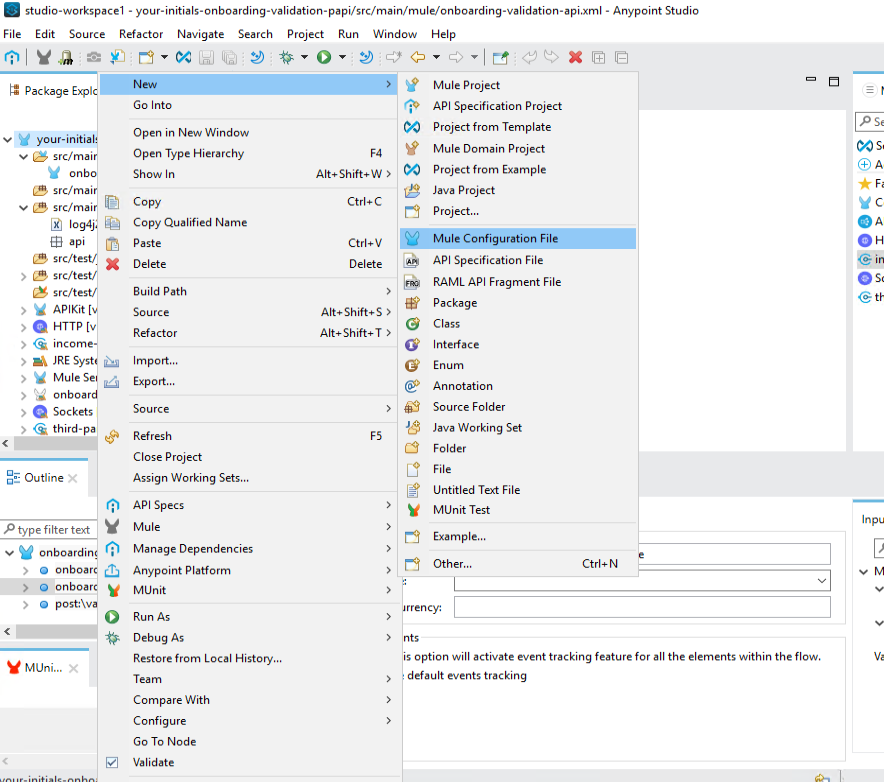
Create a dedicated Mule config file to hold the connector configurations. This is a best practice particularly for larger projects. In the Package Explorer, right-click on the project root, then select "New" - "Mule Configuration File". Name the file "Global", then click "Finish"
-
Now create a yaml file to hold the property values that we will use in our connector configurations. In the Package Explorer, right-click on "src/main/resources" then select "New" - "File". Name the file "config.yaml", then click "Finish"

-
The new file "config.yaml" should be open for entry. Paste the following text into the file and save.
third-party: host: "stg-fins-boi-service-bcvkow.86g03r.usa-e2.cloudhub.io" port: "443" base-path: "/api" protocol: "HTTPS" response-timeout: "8000" income-verification: host: "stg-fins-income-verify-xapi-bcvkow.86g03r.usa-e2.cloudhub.io" port: "443" base-path: "/api" protocol: "HTTPS" response-timeout: "18000" -
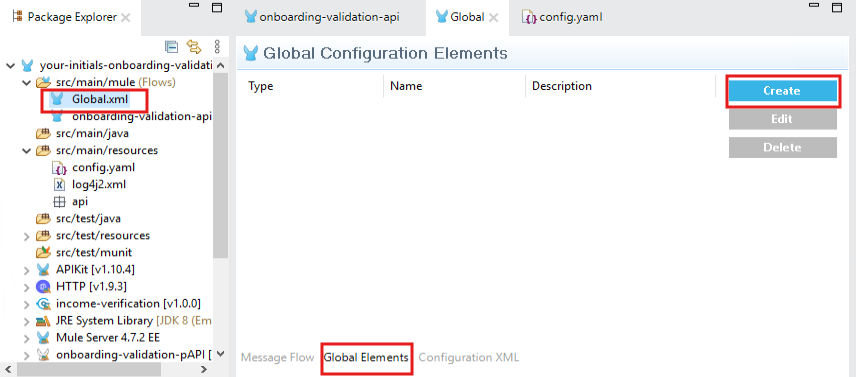
Navigate to the "Global" file in your project explorer, or double-click the "Global.xml" file in your Package Explorer to open the Mule Config file. Click "Global Elements" sub-tab, then click "Create"
-
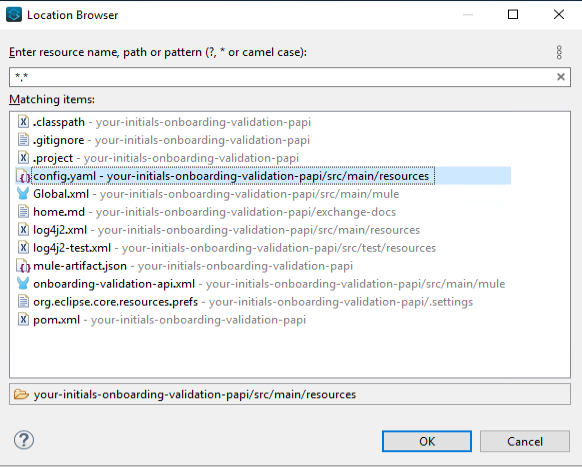
Navigate "Global Configurations", then select "Configuration Properties". Click the elipses to select the "config.yaml" file created in a prior step. Click "OK", then "OK" to save the configuration properties.
-
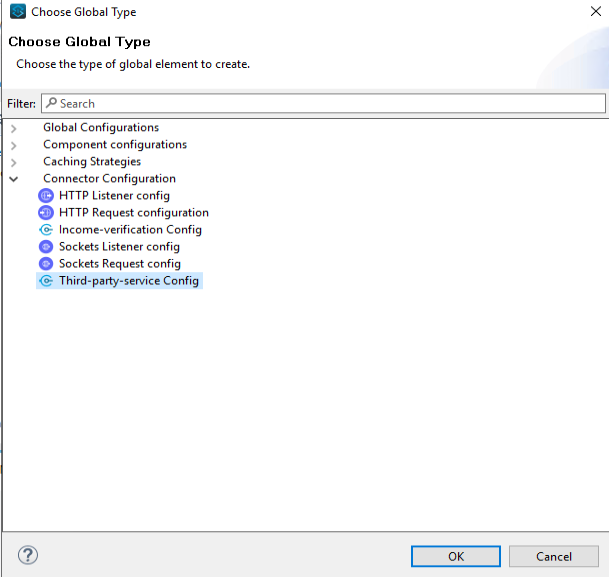
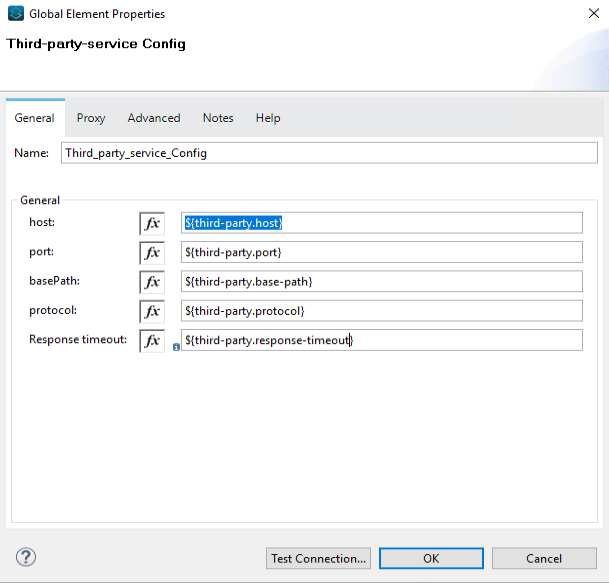
Click "Create" again and navigate to "Connector Configuration". Choose "Third-party-service Config", then click "OK"
-
Enter the following values, then click "OK":
Host
${third-party.host}
Port
${third-party.port}
BasePath
${third-party.base-path}
Protocol
${third-party.protocol}
Response timeout
${third-party.response-timeout}
-
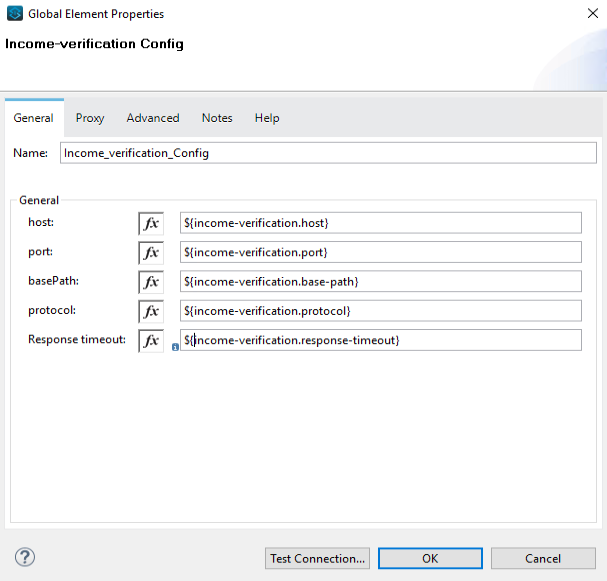
Repeat the above two steps for "Income-verification Config" with the following values:
Host
${income-verification.host}
Port
${income-verification.port}
BasePath
${income-verification.base-path}
Protocol
${income-verification.protocol}
Response timeout
${income-verification.response-timeout}
Step 4: Implement Flow Logic
Now connectivity is configured and the logic of our onboarding validation is ready to be implemented. Interacting with the (Mock) government service third-party-service represents requires making numerous consectutive calls. It begins with a establishing a transaction to get a process ID. Then we will upload a file ( a pdf file of a W-2), map the incoming onboarding validation payload to an XML structure for a second call. Then we have to poll the third-party-service as it processes the incomming information to validate it. This may require numerous calls as we await a response indicating completion.
-
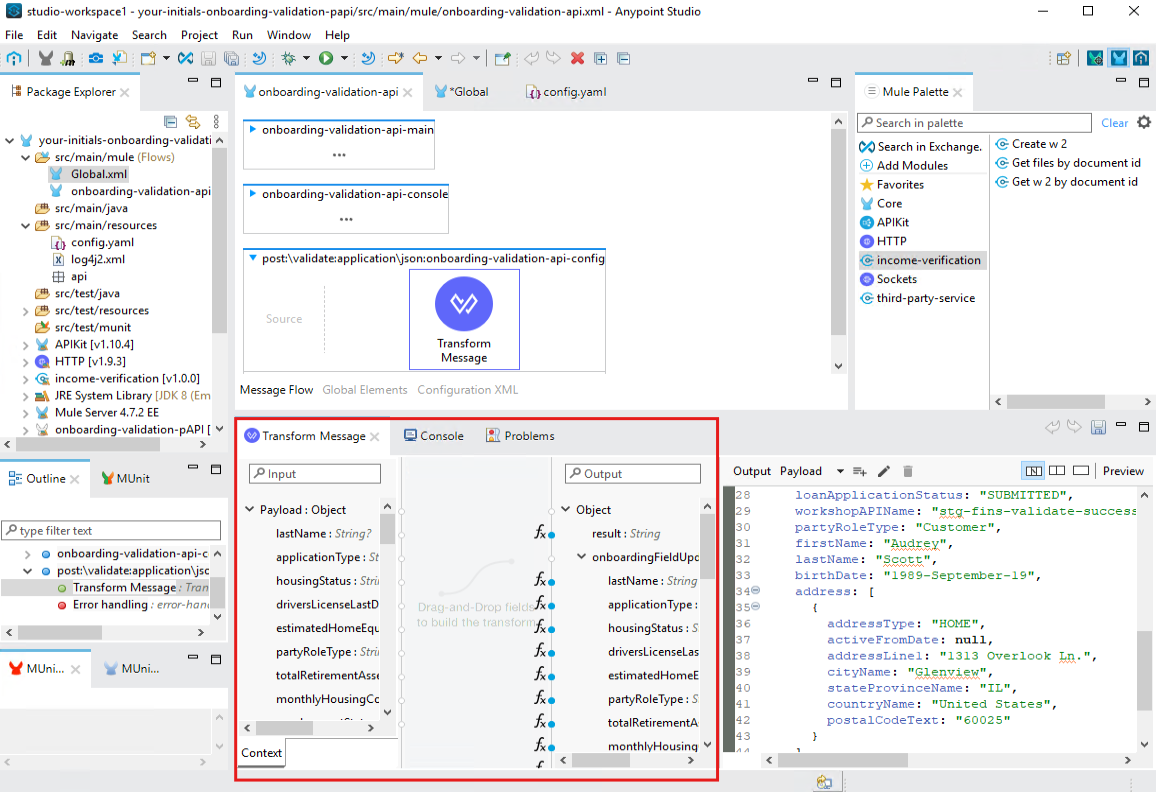
Return to the onboarding-validation-api canvas in the project explorer. Click on the "Transform message" operation created by the scafolding process. DataSense uses the API specification to make it easy to transform data, by showing the expected input and output structures. Here you can drag and drop fields to simplify crafting your logic. This project requires calling some additional services rather than a straight-forward transformation, so delete the "Transform Message" operation.
-
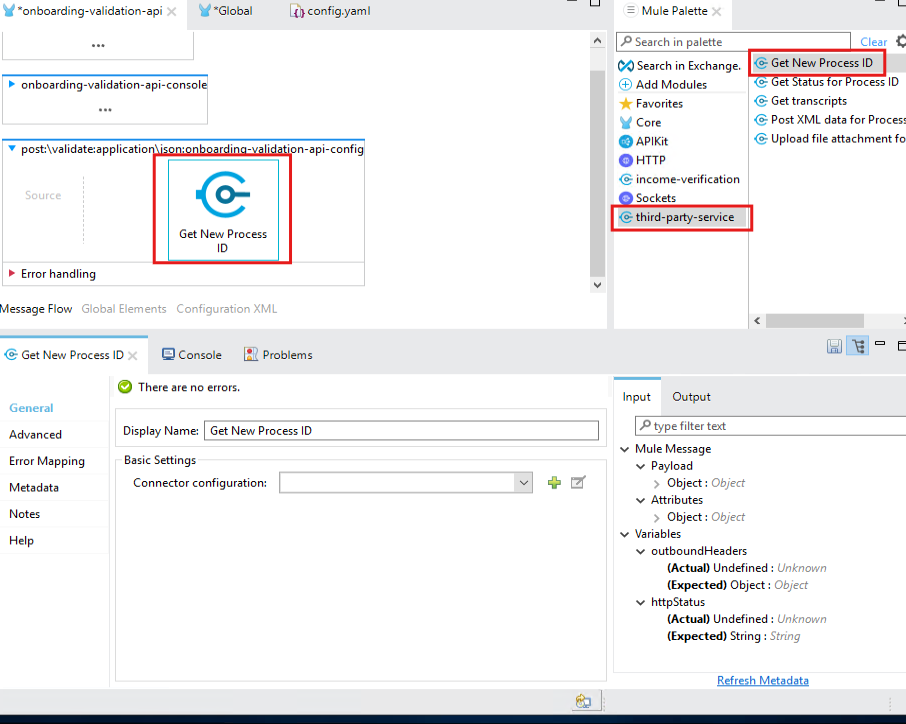
Drag the "Get New Process ID" component from the palette into the validate flow. Select in the "Connector Configuration" drop-down the "Third_party_service_Config" we created in a prior step.
-
By default, a connector operation will overwrite the payload, so store the output in a variable for later usage. Under "Advanced", select the "Target Variable" and enter "processId". Click "Apply changes" to save.

-
The next step for our third-party-service is to upload the pdf file of the W-2. But it is not in the payload sent to onboarding-validation. income-verification sAPI has the file we need, and payload has the document ID needed. From the Mule palette, drag "Get files by document id" in "income-verification" to execute after "Get New Process ID" in the canvas.
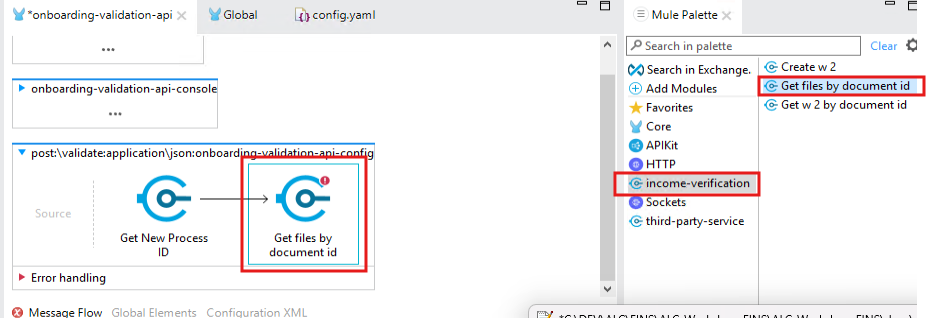
-
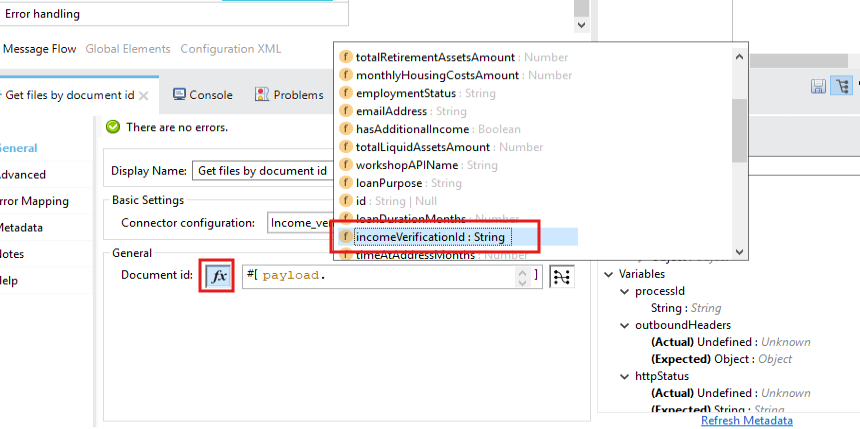
Select the "Income_verification_Config" in "Connector Config. click the "fx" (switch to expression mode) on "Document id", and find or enter "payload.incomeVerificationId". This value will come from the onboarding process that calls this API. Similar to above step, the output from this operation should be put into a variable: Under "Advanced" enter "incomeVerificationResponse" into "Target Variable"
-
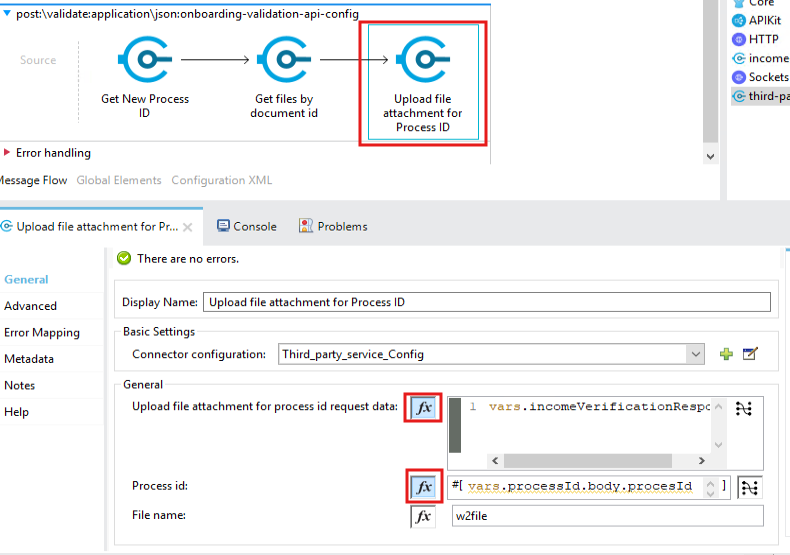
Drag "Upload file attachment for Process ID" from the palette, and provide the following configuration values (be sure to set "expression mode" (fx) for the 2 settings:
Connector Configuration
Third_party_service_Config
Upload file attachment…(fx)
vars.incomeVerificationResponse
Process id (fx)
vars.processId.body.processId
File name
w2file
Advanced-Target Variable
uploadResponse
-
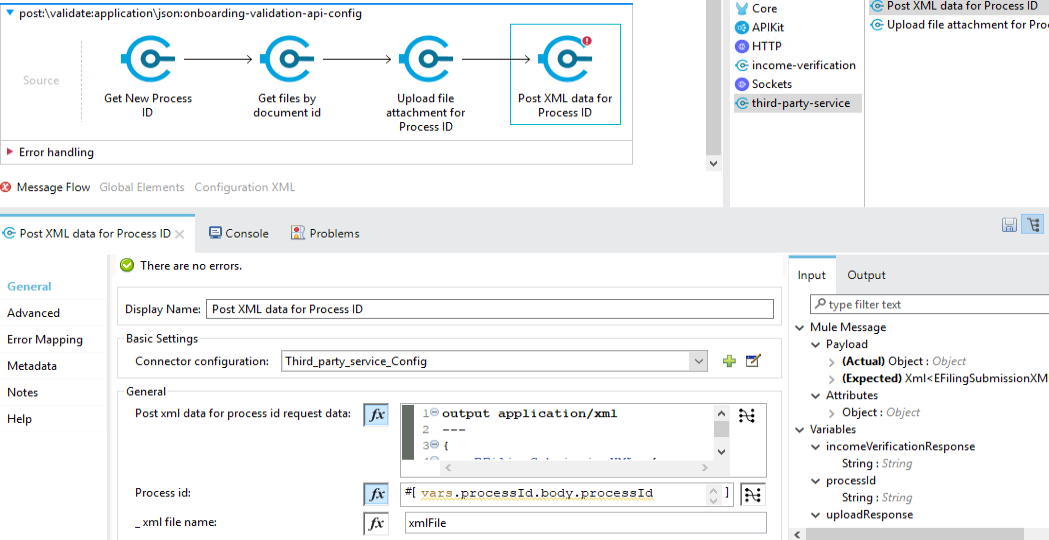
Drag "Post XML data for Process ID" from the palette. Provide the following configuration values
Connector Configuration
Third_party_service_Config
Process id (fx)
vars.processId.body.processId
File name
xmlFile
Advanced-Target Variable
xmlResponse
-
To configure "Post xml data for process id request data" click the image::dataweave.png icon. Map the following values, allowing datasense to correctly build the dataweave creating the complex XML structure needed by the third-party-service:
lastName
SubmitterEntityIndividualLastName
firstName
SubmitterEntityIndividualFirstName
emailAddress
SubmitterElectronicAddressText
activeFromDate
Activity.FilingDateText
countryName
Activity.Party.FormationCountryCodeText
cityName
Activity.Party.FormationStateCodeText
stateProvinceName
Activity.Party.StateCode
address.addressLine1
Activity.Party.Address

-
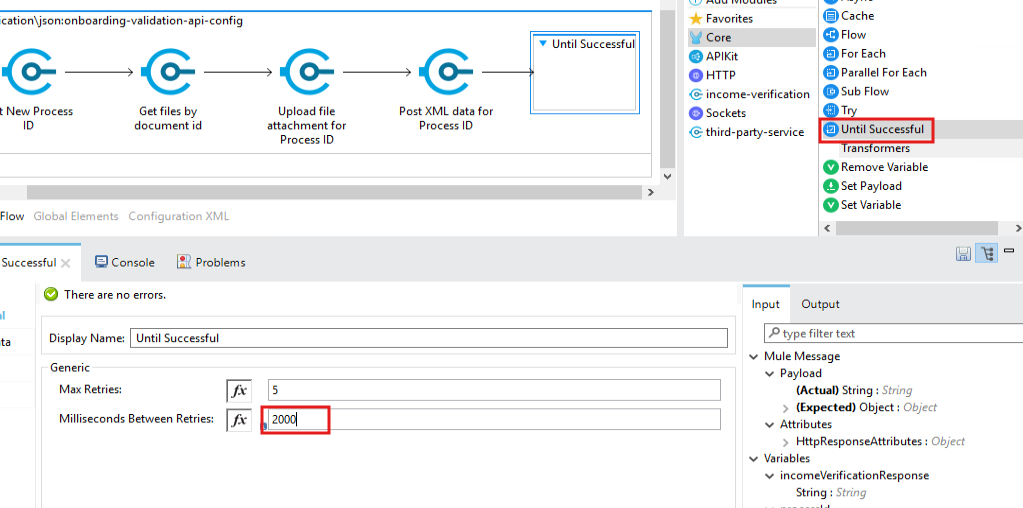
Once the third-party service has the information from the prior steps, it will provide the status with the "Get Status for Process ID" operation. Unfortunately, it takes time to process (The mock service is simulating this by having the first requests for each process ID fail). MuleSoft has an operation to repeat poll a service for this type of situation. From the pallete, under "core", drag "Until Successful" into the end of the flow. Set "Milliseconds Between Retries" to 2000 (2 seconds)
-
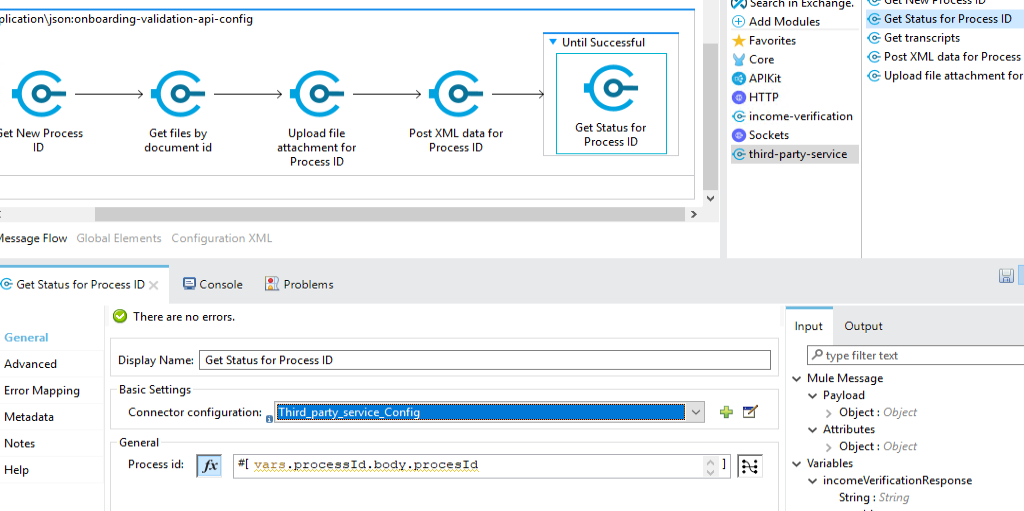
Now drag the "third-party-service" "Get Status for Process ID" into the "Until Successful" block. Set the following properties:
Connector Configuration
Third_party_service_Config
Process id (fx)
vars.processId.body.processId
-
How do we determine if the status check was successful? a "Choice" router component. Drag "Choice" from the "Core" components in the palette. For the upper path ("when") put the following with expression mode on:
payload.body.submissionStatus == "submission_validation_passed"
+ image::lab2-890-choice.png[width=800]
+ . The upper path for "Choice" router is our happy path. Drag a "Transform Message" from the "Core" in palette. Enter the following dataweave:
%dw 2.0
output application/json
---
{
	thirdPartyProcessId: vars.processId.body.processId,
	thirdPartyStatus: payload.submissionStatus,
	result: "SUCCESS"
}
+ image::lab2-900-success.png[width=800]
+ . When the call to "Get Status…" is not successful, we will raise an error to allow the "Until Successful" to retry (up to the limit). Drag "Raise error" from "Core" in the palette. Type "ANY" for the "Type" property as we don’t need to track the specific error code at this point.
+ image::lab2-910-raise.png[width=800]
Step 5: Deploy Application to CloudHub
Now that development is complete, it is time to test the API. The Application can be run or debugged locally, but this lab is going to cover deploying the application to CloudHub, MuleSoft’s IPAAS. This can be done a number of ways, including straight from Anypoint Studio.
-
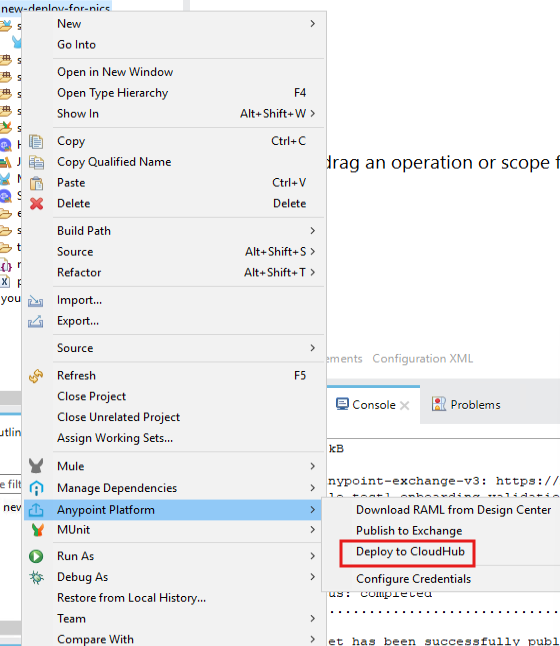
Right-click on the project in Package Explorer, select "Anypoint Platform", then "Deploy to CloudHub".
-
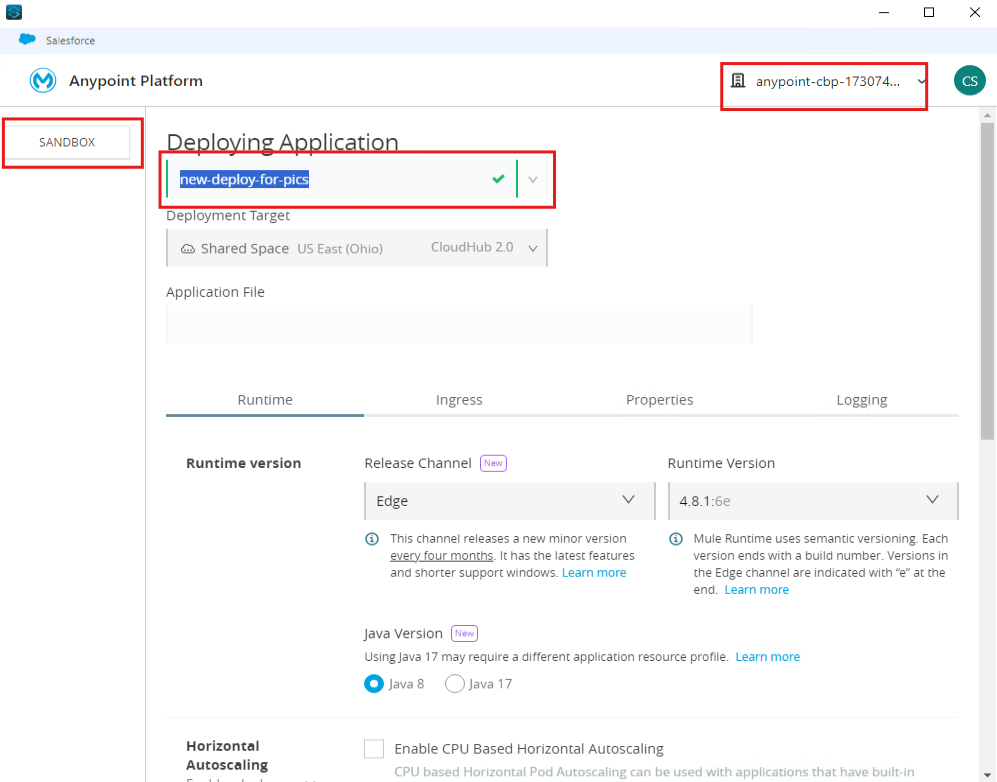
Confirm an appropriate (and unique for this workshop) application name. Ensure SANDBOX and the workshop Business group is selected. Then scroll down to "Deploy".
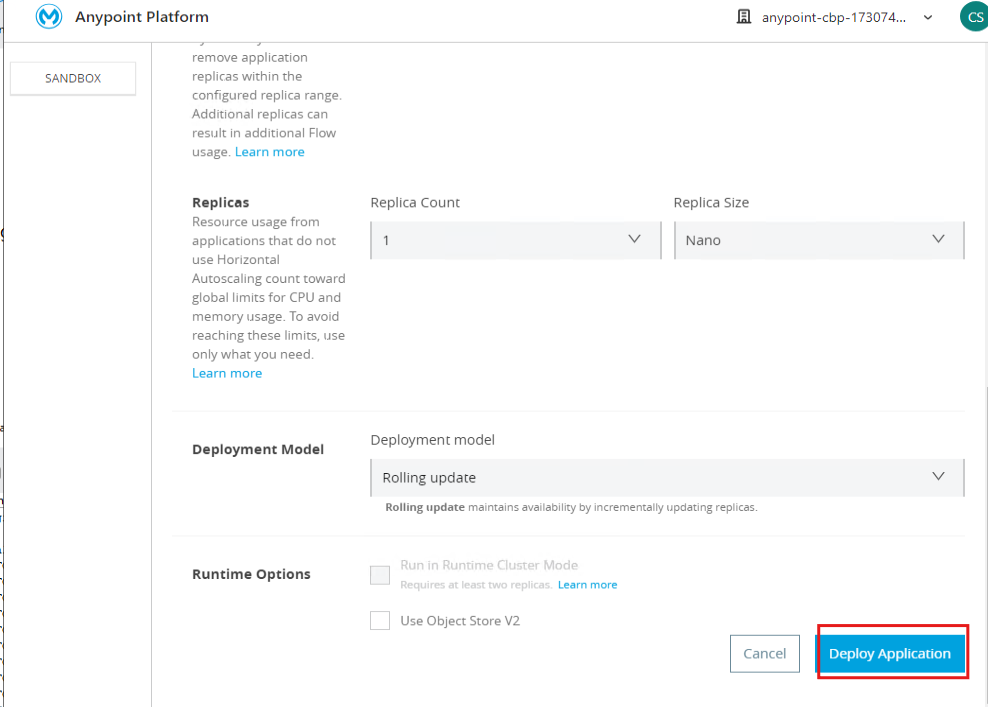
-
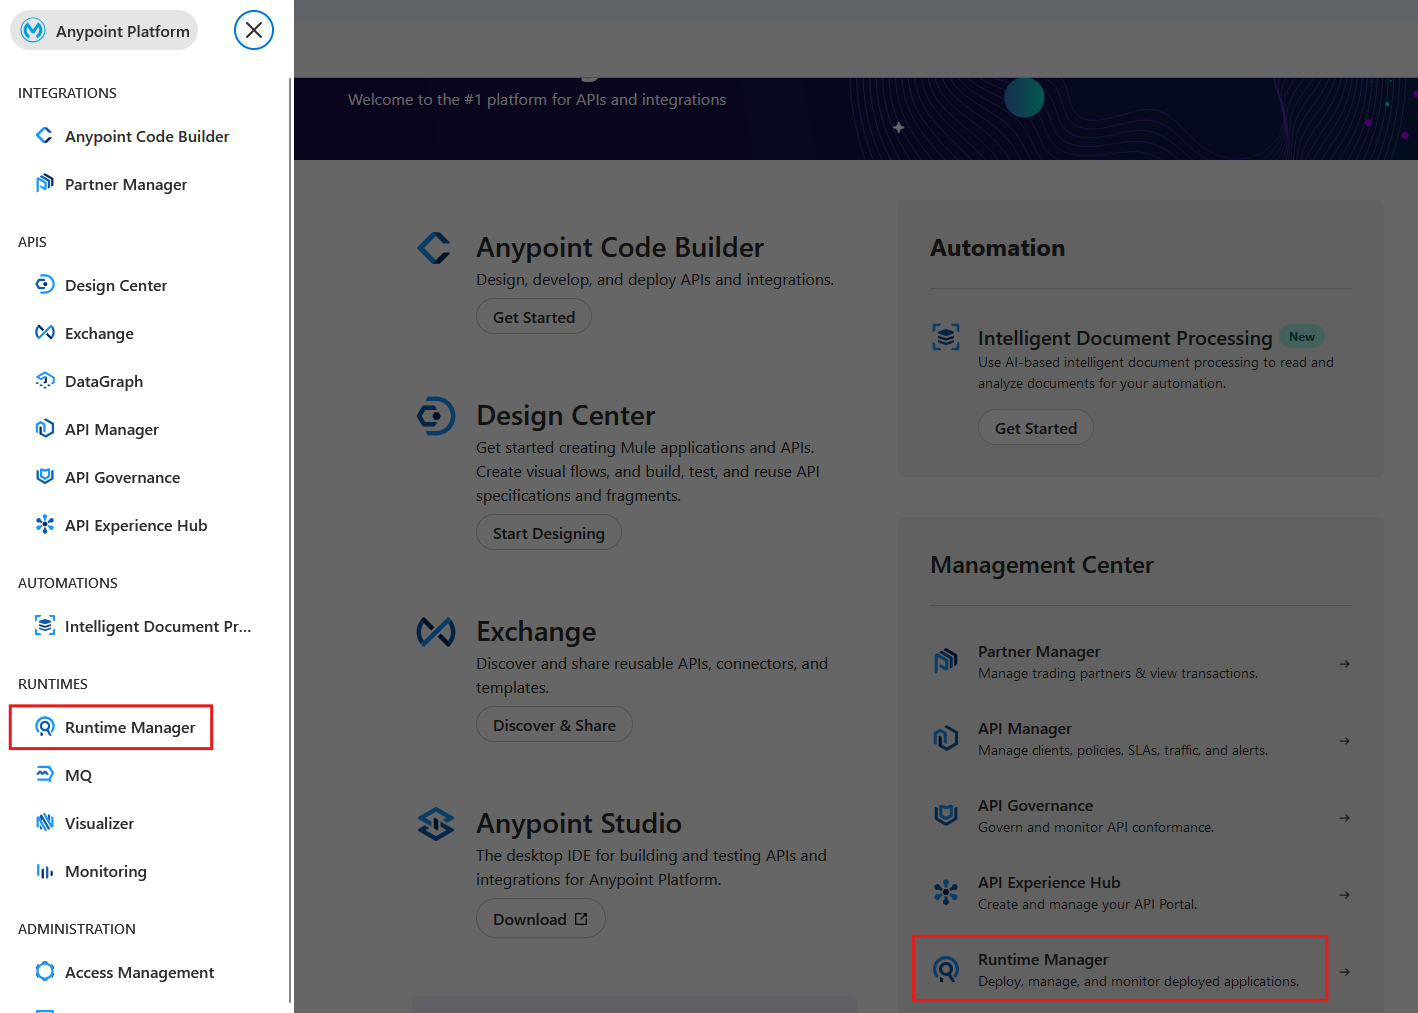
Log back in through the website https://anypoint.mulesoft.com, and navigate to Runtime manager. Ensure you are in the correct Business Group, and Environment, and locate your application instance. Click on the application, make note of the "Public Endpoint", as you will use this in the next Lab.
== Summary
Congratulations! You have now seen how to use MuleSoft’s Anypoint Platform and Studio to find and implement an API.
Now go to Lab 3: Testing Loan Application process to see how to test out the bank loan process api to onboard a new customer and use your validation logic as part of the loan origination process.